

Showing posts with label Tutorials. Show all posts
Showing posts with label Tutorials. Show all posts
Friday, August 16, 2013
Twisted or Braided in Headbands
For anyone interested, I posted a hair tutorial (two ways) over here that would be a great back to school look for your little girls. This is how we get our headbands to stay in!


Friday, July 12, 2013
Elastic Lace Belt Tutorial

Are you ready to make the easiest belt ever? Here is what you will need. A buckle. I found mine at JoAnn's right next to the elastic. Wide elastic to fit the size of your buckle. Mine was 2 inches. Fabric of your choice and lace.
One small note about the lace. You will notice that most lace has one straight edge and one scalloped edge. You don't want that. Look for some that has either two scalloped edges like mine, or two straight edges. That way your belt won't ever be upside down.
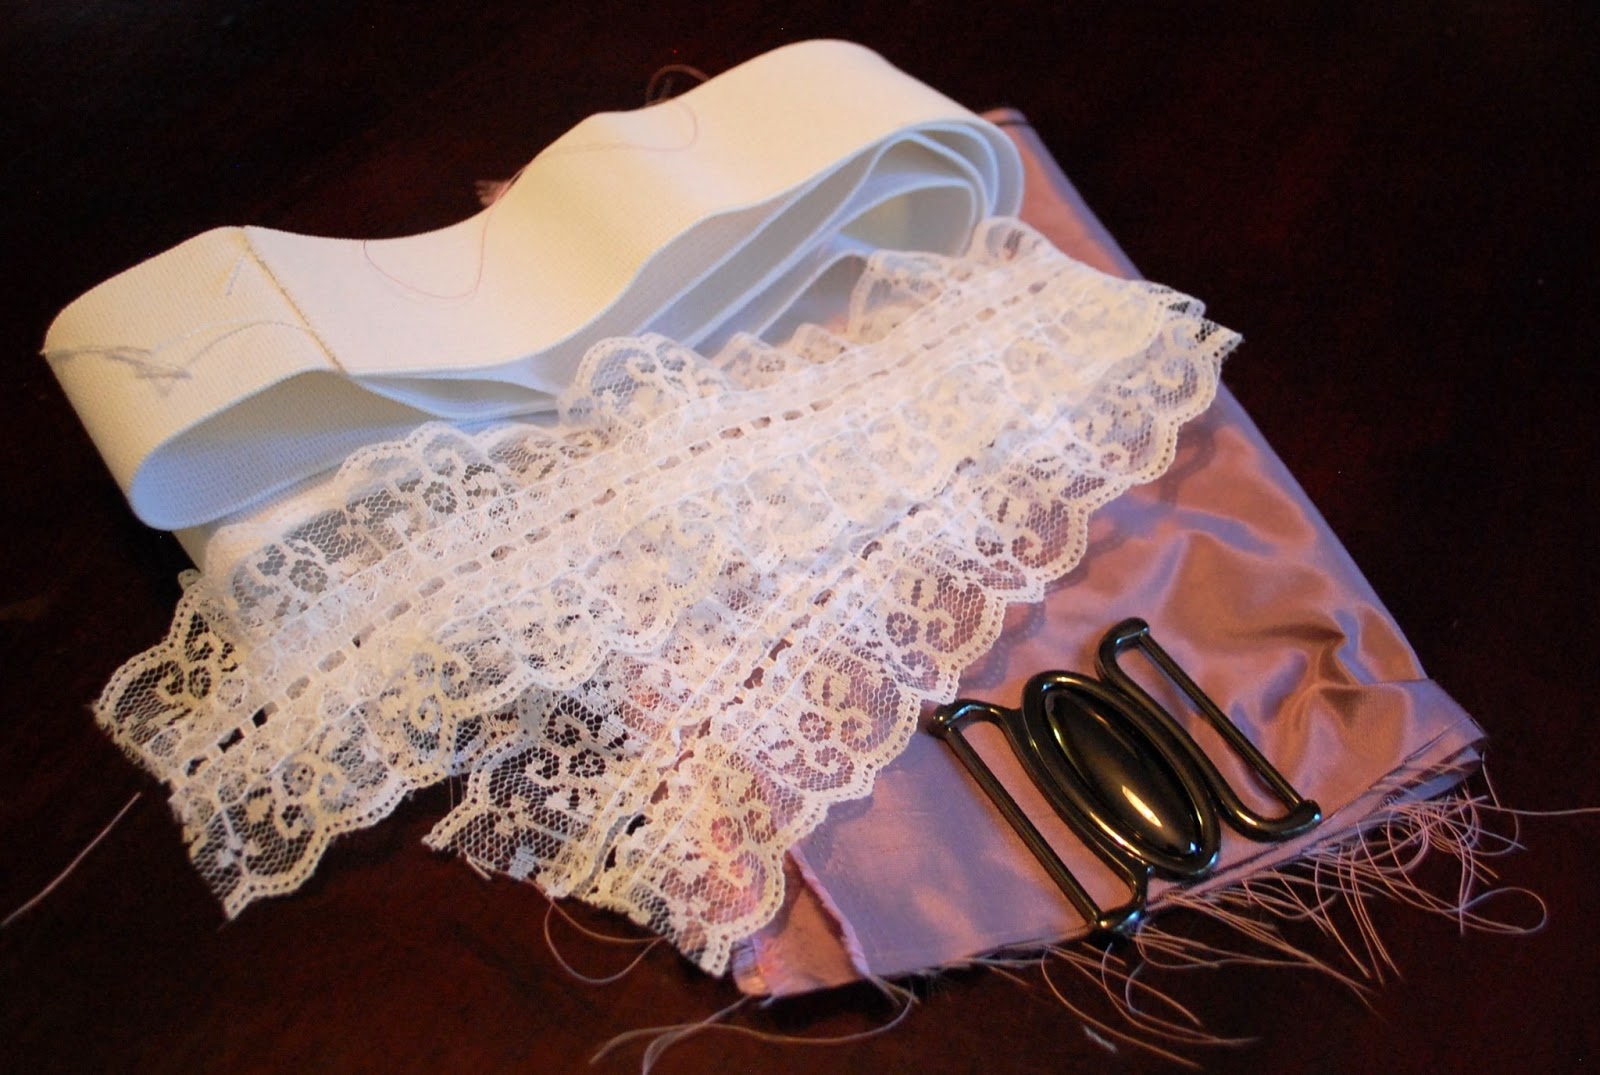
I didn't want white lace so after I got home I took out a few boxes of Rit dye I had laying around and...

15 minutes later I had some pretty charcoal grey lace. Except where the stitching was, it was more off white, but I actually liked having the dimension to it.

These are the lengths and amounts of fabric that I used for my belt, so of course you will have to adjust for your measurements, but it won't be hard. For the elastic I just measured it around my waist, added a tiny more for looping through the buckle and cut. My fabric was 6 inches wide ( I meant to cut it 7 inches wide though so I ended up just having to use a smaller seam allowance) and 8 inches longer than my elastic. If you want it bunchier than mine just add a few more inches. And you may have to sew two strips together if the standard 45 inch fabric isn't long enough, but that is totally fine. My lace was already somewhat gathered so I cut it only 4 inches longer than my elastic.

First step is to fold the fabric in half with right sides together and stitch along the raw edge. I also did a zig zag stitch to finish it off.

Turn the fabric right side out and then press so the seam is in the middle.

Attach a safety pin to your elastic and feed through the tube, just make sure the other end doesn't go up inside the fabric and get lost.

When you get to the end, center the elastic inside the tube and pin. Repeat on the other end. (Actually, what I should have done here just to have a more finished look is to tuck the raw edges in 1/4 of an inch, but I didn't. I won't dwell on that though.

Now stich across both ends and finish with a zig zag stitch.
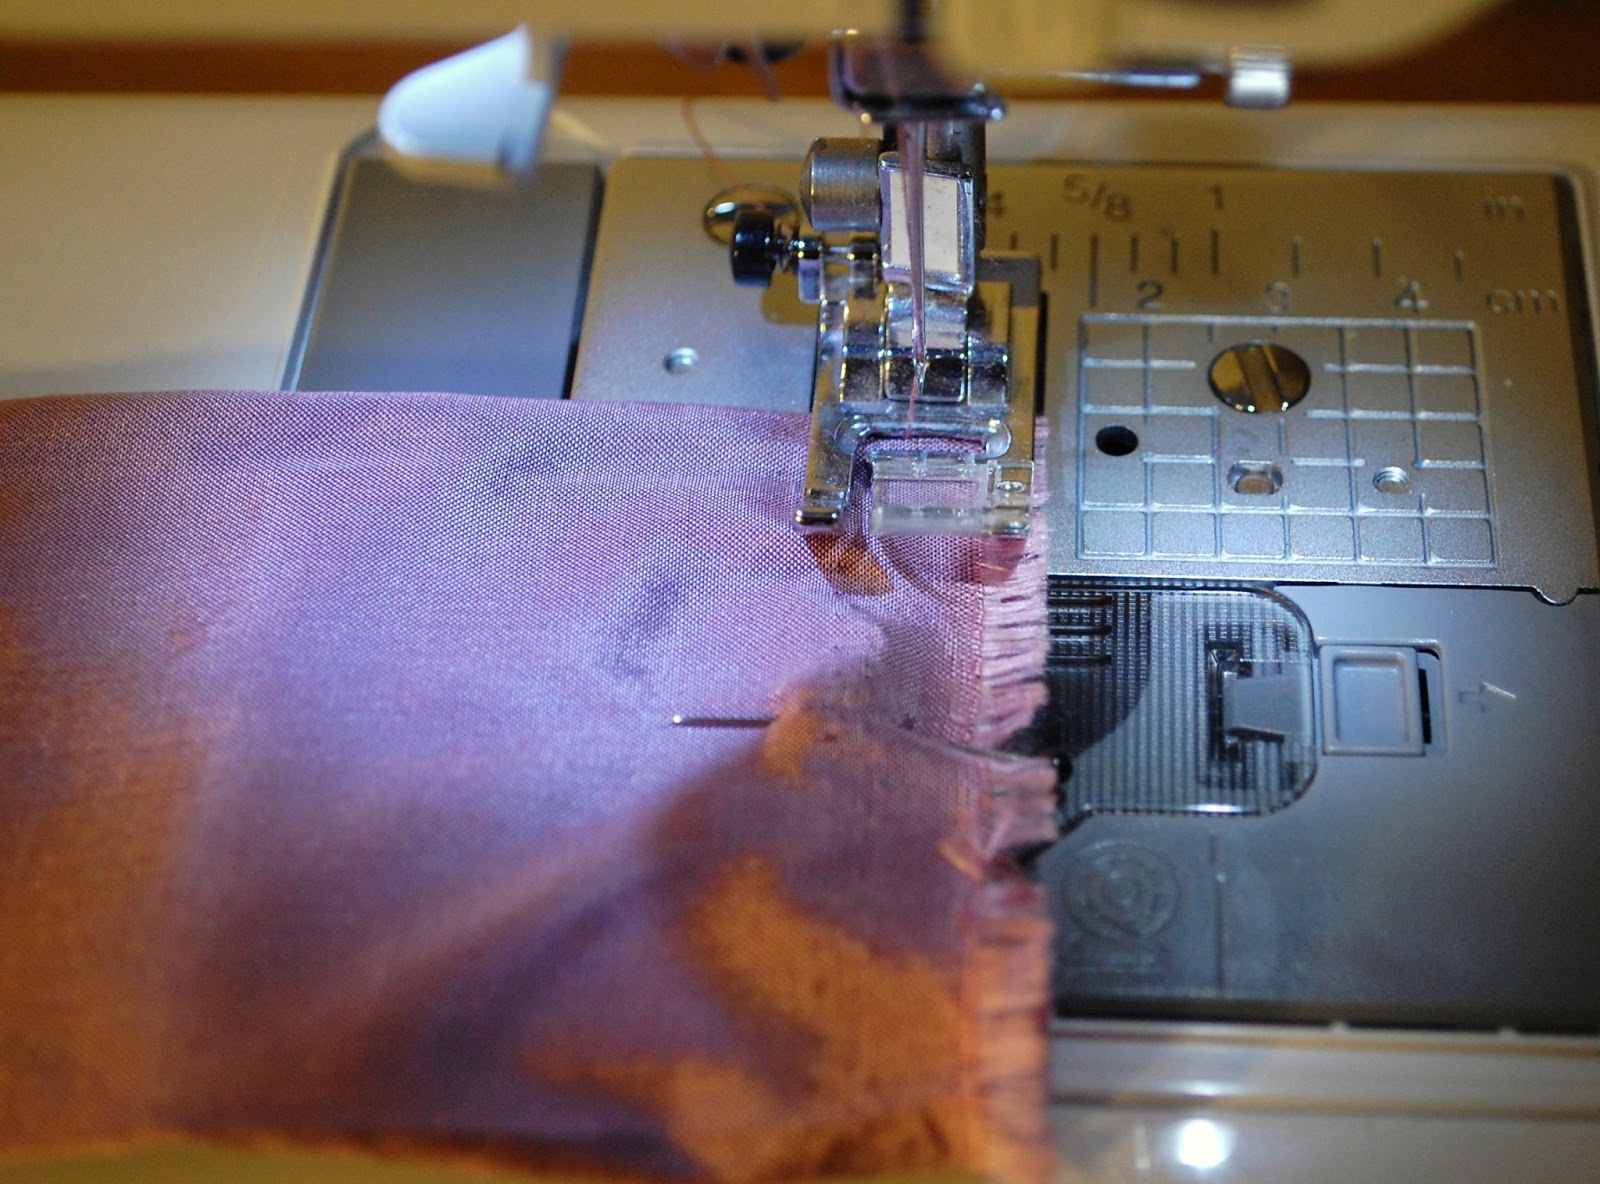
When you are done, it should be nice and scrunchy looking, like this...

Now lay your lace fabric on top of the side without the seam and sew across each end.

You should have something that looks like this

Now pull your elastic taut and pin in the center. It would be very helpful to have an extra set of hands at this point, but if you don't then just do what I did and use your knees! Now hold it in the center and pull one end taut and place another pin in the center of that section. Repeat on the other end. You should have 3 evenly spaced pins. This will make sure you lace gets evenly distributed.

Now, starting at one end, somewhere to the right of the center, sew a few stitches and a couple back stitches and then pull out from your first pin until the lace is all the way stretched out and sew down the elastic. When you get to the first pin, pull tight from the next pin and sew down, repeating until you get to the end. Then go back to the beginning and do the same thing all the way down the left side. The lace will lay down better if there are two sets of stitches instead of just one down the center.

Once the lace has been sewn on, just loop your ends through the buckle, pulling them until it fits snug around your waist and then hand stitch the ends to the back side of the belt. I also pressed my finished belt with a warm iron when I was done because my lace was popping out just a little more than I wanted.

And your done! Can you believe how easy that was?


Friday, June 28, 2013
Across the Back Tucked Under French Braid (no bobbi pins needed) Two ways!
I think that wins for longest title ever! So, it's been four months since I've posted anything on here and I'm not sure if there is still anyone out there, but I'm back so hopefully you can forgive me for being gone for so long.
OK, here is the deal with this braid. You've probably seen it before. I even mention in the video that I've been wearing it a lot lately, so there is a chance you might have even seen it on me before. However, a few weeks ago my husband and I had this fancy party to go to and we were also leaving town right after. So, after spending all day getting all the laundry washed and five suitcases packed up I did not have much time to get myself ready for the party. After a quick shower and some very fast make up maneuvers, I had about five minutes to do something with my hair. I didn't want to stoop to a ponytail, but didn't have time for much else so I through up this quick braid and suddenly had this idea how to finish it off. The end result looked like my hair had actually been "done." You and I are the only ones who know that is wasn't.


OK, here is the deal with this braid. You've probably seen it before. I even mention in the video that I've been wearing it a lot lately, so there is a chance you might have even seen it on me before. However, a few weeks ago my husband and I had this fancy party to go to and we were also leaving town right after. So, after spending all day getting all the laundry washed and five suitcases packed up I did not have much time to get myself ready for the party. After a quick shower and some very fast make up maneuvers, I had about five minutes to do something with my hair. I didn't want to stoop to a ponytail, but didn't have time for much else so I through up this quick braid and suddenly had this idea how to finish it off. The end result looked like my hair had actually been "done." You and I are the only ones who know that is wasn't.


This is my first ever video tutorial so be kind!
And here are a few shots of my daughter's hair before she ran around and got it all messy.


Linked up @ iheartnaptime.net and sugarbeecrafts.com
Sunday, July 15, 2012
Make Your Own Cheese
The other day my husband was watching Rick Bayless on his cooking show and suddenly announced that he wanted to make his own cheese. So, we went to the store to buy a few simple ingredients, and while I made fresh tortillas he got to work making Queso Fresco Mexicano. This is sooo simple to make and our kids were fascinated by the process. Oh, and the cheese tastes really good too! You should try it.
Start by heating up a gallon of 2% milk and 2 cups of buttermilk over medium heat until it reaches 75 degrees. Then, turn off the heat, cover the pot, and let sit for 3-4 hours.

Next you are going to separate the curds from the whey by adding 1 tsp of citric acid dissolved in 1/4 C cold water, OR 1 cup of fresh lime juice. Heat the milk again over medium heat until it reaches 195 degrees, stirring occasionally The whole process takes about 20 minutes. We could not find citric acid at any of our local grocery stores so we went with the lime juice. I was a little bit worried about having lime flavored cheese, but the lime flavor was pretty subtle and I think it made the cheese even better. And really, this is Mexican cheese, so any dish you add this too is going to go great with a little lime.

Once all the curds have separated, turn off the heat and let the pot sit for about five minutes before scooping the curds out onto cheese cloth.

...eating her curds and whey...seems kind of weird now huh?

OK, so there will be a little bit of moisture still in the cheese. Instead of just squeezing the cheese cloth, you need to gently push on it with the back of a spoon.

I don't have any pictures of the next few steps, but basically you sprinkle the cheese with salt (in my opinion Rick's recipe called for a little too much and the cheese was just a little too salty) Form the cheese into a disk (or just push it down into the bottom of a bowl like my husband did), cover and chill in the refrigerator.
Once it's chilled you can eat it any way you darn well please. We ate ours with warm fresh tortillas, and then ate then rest straight out of the bowl.

Overall the process is kind of long, because it has to sit for several hours, but it's not hard, it tastes really good, and it's just kind of fun to say that you made your own cheese!
Queso Fresco Mexicano
Slightly adapted from Rick Bayless, and by slightly adapted I mean I used table salt instead of sea salt so I used less. Otherwise, I wouldn't have a clue how to change a cheese recipe.
1 Gallon whole or 2% milk
2 C buttermilk
1 tsp citric acid OR 1 C fresh lime juice
1/2 tsp salt
Cheese cloth
Thermometer that goes as low as 75 degrees
Combine milk and buttermilk in a large pot and heat over medium heat until the mixture reaches 75 degrees. Tun off the heat, cover the pot and let sit for 3-4 hours.
If you find citric acid, start by dissolving 1 tsp in cool water, otherwise squeeze enough limes to get 1 cup juice. Add the citric acid mixture OR the lime juice to the milk and turn the heat back on to medium, stirring occasionally until it reaches 195 degrees. Remove from heat and let sit 5 minutes.
Using a slotted spoon scoop out the curds onto cheese cloth that has been placed over a colander.
Gather up the cheese cloth and gently press the curds with the back of a spoon to expel the remaining whey.
Open up the cloth, sprinkle with salt and work it in with your hands,
Press the curds into a 1-inch disk. Cover and chill.
Then wow everyone by telling them that you made your own cheese!

Sunday, May 6, 2012
I Had to Sacrifice a Nap, but I Finally Got it Done!
Laila has finally in the last month started taking real naps. Instead of forty minutes, I actually get 2 hours! That means I've been able to take a Sunday nap the last 3 weeks in a row. Not today though. Remember how terrible my feet looked on Thursday's post? I couldn't stand it anymore.
This is actually a re-post, but since a lot of you might not have seen it a year ago and most of you that did see it have probably forgotten about it, I figured it wouldn't hurt to post it again.
For an easy french pedicure, check out This Tutorial I did as a guest post.
Today I decided to get a little crazy and do blue.


This is actually a re-post, but since a lot of you might not have seen it a year ago and most of you that did see it have probably forgotten about it, I figured it wouldn't hurt to post it again.
For an easy french pedicure, check out This Tutorial I did as a guest post.
Today I decided to get a little crazy and do blue.

Now I can wear sandals tomorrow and not be embarrassed.
Sunday, March 18, 2012
Make Your Own Fuzzy
Some people think I'm crazy, but I have tried desperately to get Laila to take a pacifier or suck her thumb. All to no avail. I need something to sooth her other than myself, so now I'm forcing her to have a comfort item. I made her this little blanket to snuggle with when we nurse, because she loves to grab on to my hair. I don't actually mind that she holds onto my hair, it's the yanking out handfuls that's a problem.

I'm not sure what the actual term for these little soft blankets is. A friend of mine called it a cuddle blanket the other day and I've heard other people refer to them as silkies, but in our house, any type of soft blanket is a fuzzy thanks to this girl of mine. She is 9 and still can't part with her baby blanket that she affectionately calls Fuzzy. Even though the blanket has holes in it and the batting has come out, she has made me promise on several occasions that I won't get rid of it.

Alright, so this is pretty much sewing 101. I probably didn't even need to take pictures, but that makes for a boring post, so take pictures at night in horrible lighting I did.
Start by cutting out two squares of 12 X 12 fabric and rounding the corners. Anything soft and cuddly will work. You could even use two squares of the same fabric, but I wanted mine to have different textures.

I used my little pin cushion lady to round my corners, but anything you have on hand will work.


Next you will need one strip of silky fabric that is 3 inches wide by 72 inches long. I used flannel backed satin. You will have to sew together two strips to get the 72 inches in length and just in case anyone doesn't know, the best way to do that is to lay your pieces right sides together, sew from corner to corner and then trim off the excess above the line like I've shown.

Once you open it up it will look like this. Of course you will want to press the seam so it lays nicely, not lumpy like mine looks.

Next, press the strip in half with wrong sides together and at one end fold the edge in about 1/2 and inch.

After that you are going to sew two rows of straight stitches, setting the stitch length as long as possible, along the raw edge starting about an inch down from the folded edge.

Next Holding onto the bobbin threads your are going to pull the fabric down along the thread to gather the fabric until it is 48 inches long. Sorry, no picture. If anyone has never gathered fabric before and is confused about what I mean, let me know and I will try and explain it better. Or check out this tutorial.
Now pin your gathered strip, starting with the folded edge, to the right side of one of your fabric squares, with the raw edges matching up

Once you get all the way around the square, tuck the end inside the folded end.

It should look like this. Sew the two pieces together using a 1/4 inch seam allowance.

Remove your pins and place your second square of fabric on top of the other, right sides together. It may seem like extra work to pin and sew and then pin and sew it all together, but I promise this is the best way to do it. Sew all three layers together using a 1/2 inch seam allowance, but leave a 3 inch section open.

Trim your seams to 1/4 inch and clip the corners. Sorry no picture again. Then turn right side out.
All that is left to do is hand stitch the 3 inch opening closed, which if you followed my instructions, should only be on one side of the blanket, and hand stitch together the seam where the two pieces of ruffle meet.
And your done!

Even though it hasn't completely replaced her desire to grab my hair, she does like to snuggle with it when she sleeps.

I will be making a boy version soon for a friend of mine, but I'm not sure a cute ruffle is the best way to go. I might have to actually bind it like a quilt. Good thing they are small!

Linking up at I heart naptime, Saved by love creations, and Flamingo Toes
Subscribe to:
Posts (Atom)
