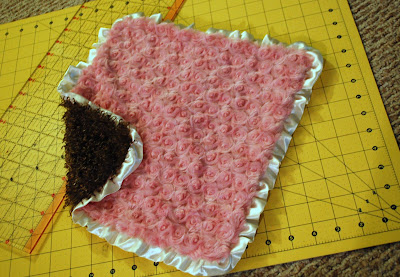
Some people think I'm crazy, but I have tried desperately to get Laila to take a pacifier or suck her thumb. All to no avail. I need something to sooth her other than myself, so now I'm forcing her to have a comfort item. I made her this little blanket to snuggle with when we nurse, because she loves to grab on to my hair. I don't actually mind that she holds onto my hair, it's the yanking out handfuls that's a problem.
I'm not sure what the actual term for these little soft blankets is. A friend of mine called it a cuddle blanket the other day and I've heard other people refer to them as silkies, but in our house, any type of soft blanket is a fuzzy thanks to this girl of mine. She is 9 and still can't part with her baby blanket that she affectionately calls Fuzzy. Even though the blanket has holes in it and the batting has come out, she has made me promise on several occasions that I won't get rid of it.
Alright, so this is pretty much sewing 101. I probably didn't even need to take pictures, but that makes for a boring post, so take pictures at night in horrible lighting I did.
Start by cutting out two squares of 12 X 12 fabric and rounding the corners. Anything soft and cuddly will work. You could even use two squares of the same fabric, but I wanted mine to have different textures.
I used my little pin cushion lady to round my corners, but anything you have on hand will work.
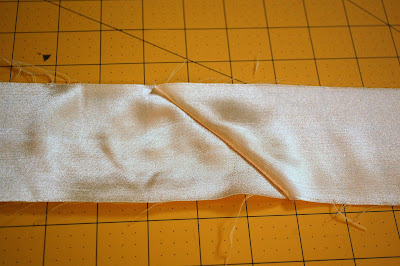
Next you will need one strip of silky fabric that is 3 inches wide by 72 inches long. I used flannel backed satin. You will have to sew together two strips to get the 72 inches in length and just in case anyone doesn't know, the best way to do that is to lay your pieces right sides together, sew from corner to corner and then trim off the excess above the line like I've shown.
Once you open it up it will look like this. Of course you will want to press the seam so it lays nicely, not lumpy like mine looks.
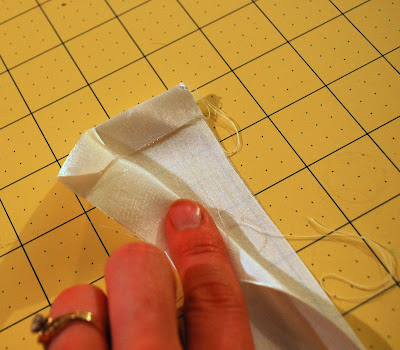
Next, press the strip in half with wrong sides together and at one end fold the edge in about 1/2 and inch.
After that you are going to sew two rows of straight stitches, setting the stitch length as long as possible, along the raw edge starting about an inch down from the folded edge.
Next Holding onto the bobbin threads your are going to pull the fabric down along the thread to gather the fabric until it is 48 inches long. Sorry, no picture. If anyone has never gathered fabric before and is confused about what I mean, let me know and I will try and explain it better. Or check out this tutorial.
Now pin your gathered strip, starting with the folded edge, to the right side of one of your fabric squares, with the raw edges matching up
Once you get all the way around the square, tuck the end inside the folded end.
It should look like this. Sew the two pieces together using a 1/4 inch seam allowance.
Remove your pins and place your second square of fabric on top of the other, right sides together. It may seem like extra work to pin and sew and then pin and sew it all together, but I promise this is the best way to do it. Sew all three layers together using a 1/2 inch seam allowance, but leave a 3 inch section open.
Trim your seams to 1/4 inch and clip the corners. Sorry no picture again. Then turn right side out.
All that is left to do is hand stitch the 3 inch opening closed, which if you followed my instructions, should only be on one side of the blanket, and hand stitch together the seam where the two pieces of ruffle meet.
And your done!
Even though it hasn't completely replaced her desire to grab my hair, she does like to snuggle with it when she sleeps.
I will be making a boy version soon for a friend of mine, but I'm not sure a cute ruffle is the best way to go. I might have to actually bind it like a quilt. Good thing they are small!
Linking up at I heart naptime, Saved by love creations, and Flamingo Toes


1 comment:
Great job Sally, for as long as I have sewed, I never knew about the corner to corner way. Thanks!!!
Post a Comment