

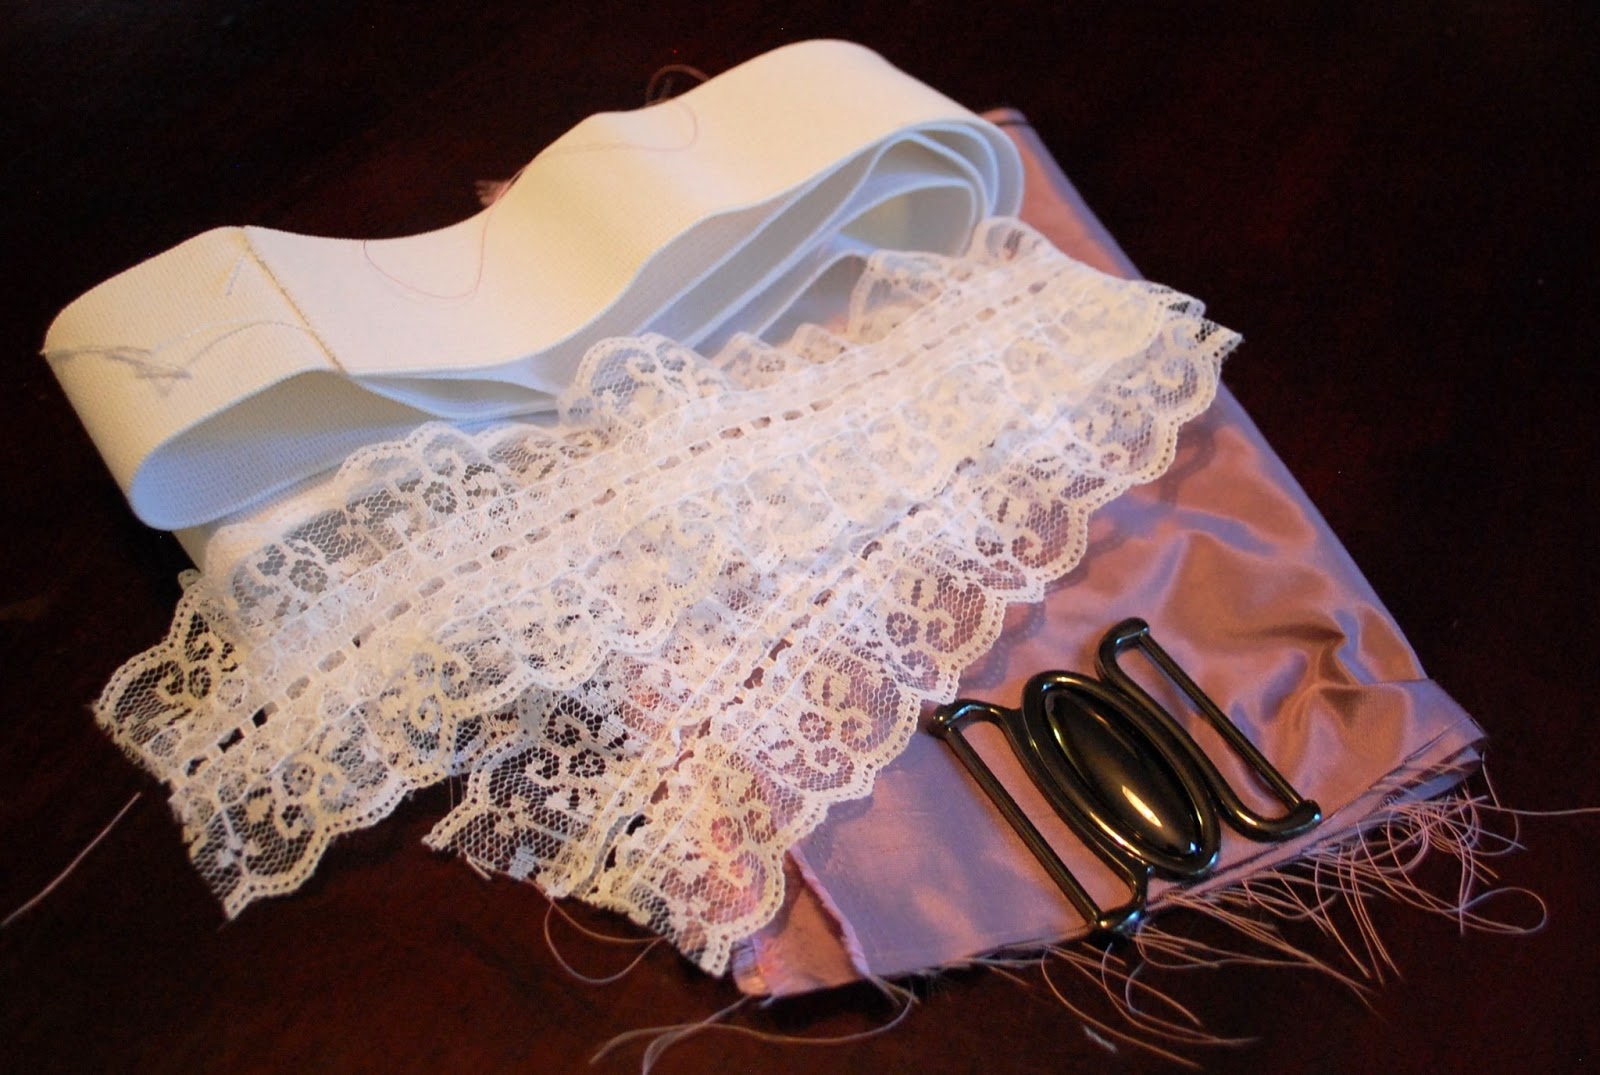
Are you ready to make the easiest belt ever? Here is what you will need. A buckle. I found mine at JoAnn's right next to the elastic. Wide elastic to fit the size of your buckle. Mine was 2 inches. Fabric of your choice and lace.
One small note about the lace. You will notice that most lace has one straight edge and one scalloped edge. You don't want that. Look for some that has either two scalloped edges like mine, or two straight edges. That way your belt won't ever be upside down.
I didn't want white lace so after I got home I took out a few boxes of Rit dye I had laying around and...

15 minutes later I had some pretty charcoal grey lace. Except where the stitching was, it was more off white, but I actually liked having the dimension to it.

These are the lengths and amounts of fabric that I used for my belt, so of course you will have to adjust for your measurements, but it won't be hard. For the elastic I just measured it around my waist, added a tiny more for looping through the buckle and cut. My fabric was 6 inches wide ( I meant to cut it 7 inches wide though so I ended up just having to use a smaller seam allowance) and 8 inches longer than my elastic. If you want it bunchier than mine just add a few more inches. And you may have to sew two strips together if the standard 45 inch fabric isn't long enough, but that is totally fine. My lace was already somewhat gathered so I cut it only 4 inches longer than my elastic.

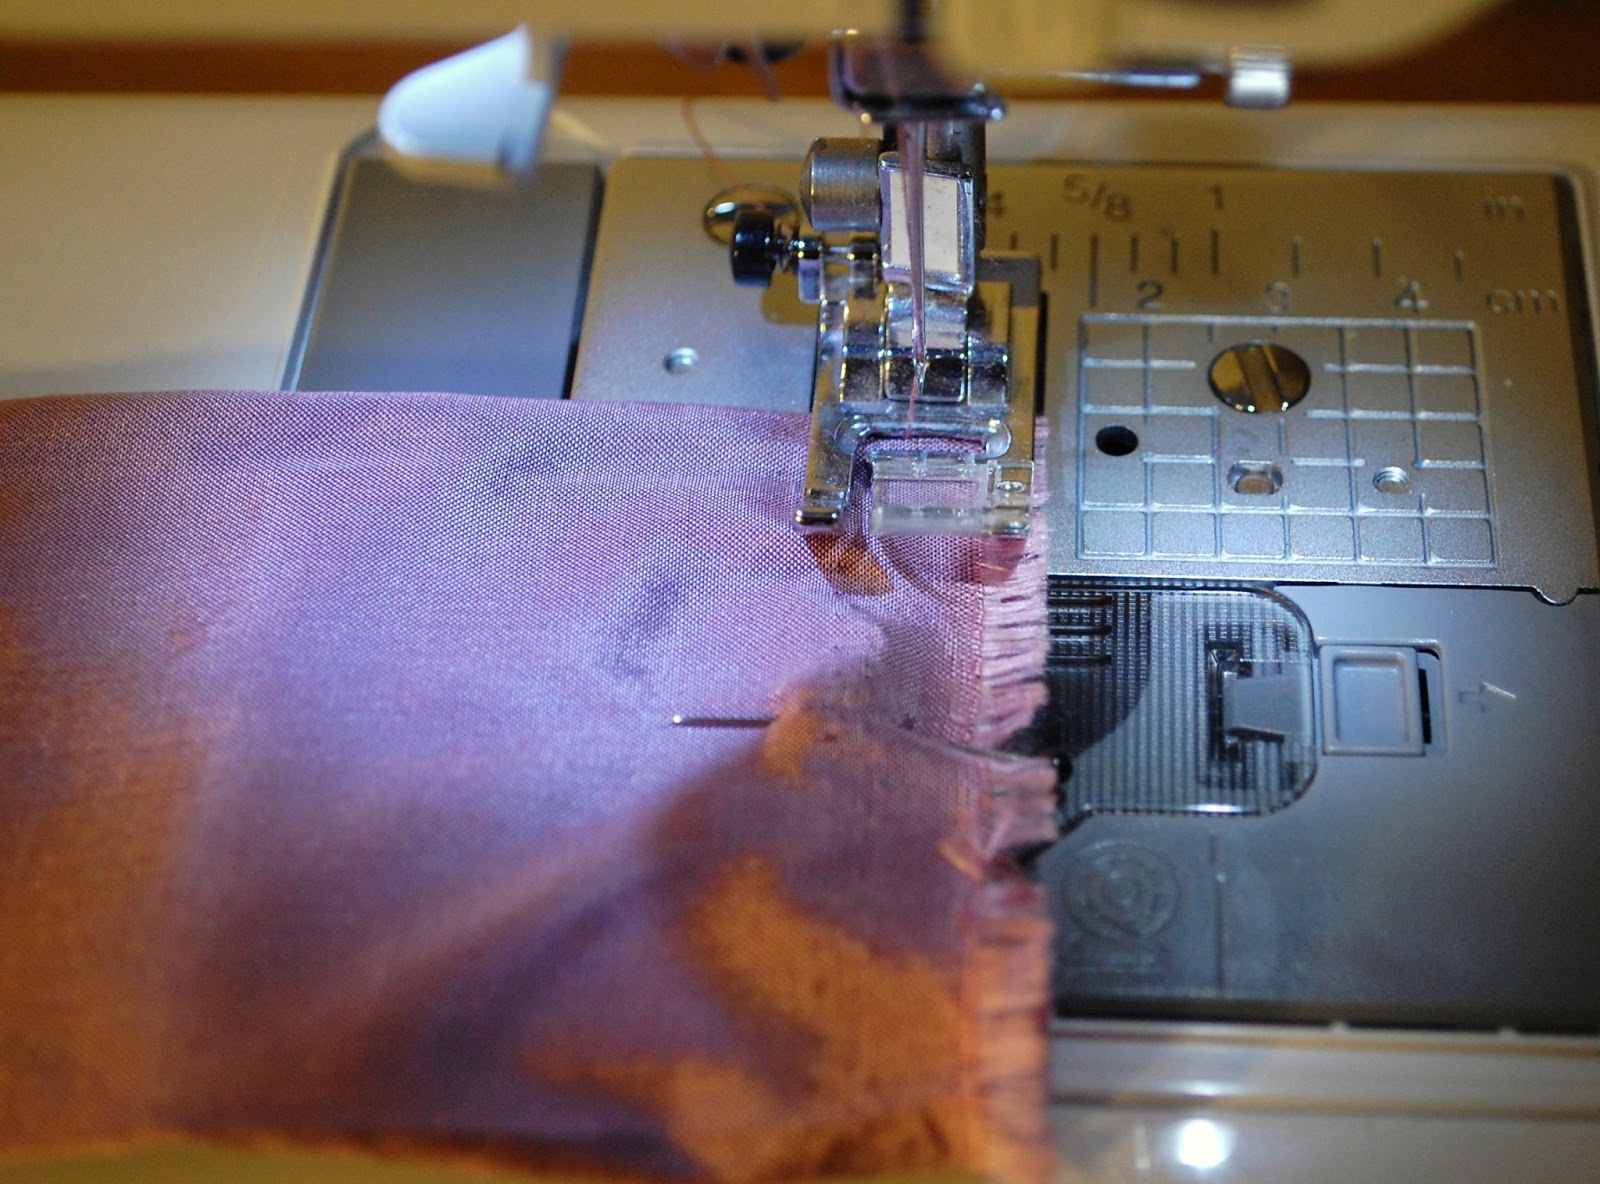
First step is to fold the fabric in half with right sides together and stitch along the raw edge. I also did a zig zag stitch to finish it off.

Turn the fabric right side out and then press so the seam is in the middle.

Attach a safety pin to your elastic and feed through the tube, just make sure the other end doesn't go up inside the fabric and get lost.

When you get to the end, center the elastic inside the tube and pin. Repeat on the other end. (Actually, what I should have done here just to have a more finished look is to tuck the raw edges in 1/4 of an inch, but I didn't. I won't dwell on that though.

Now stich across both ends and finish with a zig zag stitch.
When you are done, it should be nice and scrunchy looking, like this...

Now lay your lace fabric on top of the side without the seam and sew across each end.

You should have something that looks like this

Now pull your elastic taut and pin in the center. It would be very helpful to have an extra set of hands at this point, but if you don't then just do what I did and use your knees! Now hold it in the center and pull one end taut and place another pin in the center of that section. Repeat on the other end. You should have 3 evenly spaced pins. This will make sure you lace gets evenly distributed.

Now, starting at one end, somewhere to the right of the center, sew a few stitches and a couple back stitches and then pull out from your first pin until the lace is all the way stretched out and sew down the elastic. When you get to the first pin, pull tight from the next pin and sew down, repeating until you get to the end. Then go back to the beginning and do the same thing all the way down the left side. The lace will lay down better if there are two sets of stitches instead of just one down the center.

Once the lace has been sewn on, just loop your ends through the buckle, pulling them until it fits snug around your waist and then hand stitch the ends to the back side of the belt. I also pressed my finished belt with a warm iron when I was done because my lace was popping out just a little more than I wanted.

And your done! Can you believe how easy that was?


5 comments:
Very cute Sally! Love your picture.
Nice work! Easy and cute! I like that!! :)
That does not look easy to me at all since I am a complete an utter failure when it comes to sewing but it came out cute and that is such a gorgeous picture of you.
Thanks Julie! I have complete confidence that you could make this belt! The only thing you have to know how to do is sew a straight line. And it really doesn't matter if it's completely straight!
Very pretty! Thanks for sharing at my Pin Me Linky Party!
Post a Comment