Showing posts with label Crafts. Show all posts

Sunday, February 12, 2012

Homemade Sprinkles

A couple weeks ago, after much debating, I finally started Laila on solids. I started off with rice cereal, but she gagged on every bite, so I bought a few little jars of baby food, and sweet potatoes were a big hit! After  she finished off the first jar I just couldn't throw it away because it was so tiny and cute. I knew there had to be something I could do with it. It only took about 30 seconds. With Valentines day coming up, I decided that heart sugar cookies with some frosting and  homemade sprinkles would be a perfect gift to give to the kid's teachers. I don't really do anything for Christmas since it's such a crazy time of year, so I try to make up for it on Valentines day.

Most baby food jars are kind of short and squatty, but the Earth's Best brand are a little taller and thinner. Perfect for sprinkle jars. They cost a little more than the Gerber ones, but are still only around fifty cents a jar, so they won't break the bank.


I did some searching online for sprinkle recipes, but most people had you pipe out the frosting in long tubes and then cut them up into rectangles and it just wasn't very cute. Then, I found this recipe and it was exactly what I was looking for. One thing I should mention though is that these need to sit out over night to dry so don't expect to whip them up and use them right away.

Start by combining 1 cup of powdered sugar with 1 Tablespoons of milk and 1 Tablespoon of corn syrup. Next add a few drops of food coloring and 1/4 - 1/2 tsp of Lemon extract or whatever flavor you want. I happen to think that lemon goes the best with sugar cookies and isn't overwhelming. 

It should look like this. You want this to be pretty thick so it doesn't run all over the wax paper. If you need to, you can add another teaspoon of milk, but you really shouldn't need more than that.


You can either put the sugar mixture into a pastry bag or just a regular zip lock bag like I did and cut a small hole in the corner, and then squeeze out your sprinkles onto wax paper. One small word of caution. Making the sprinkles too small will take you forever! And only fill up one jar! Trust me, my first round were tiny. However, making them too big means they will take a long time to dry. It's hard to say what the perfect size is, but if it's taking a long time and seems really tedious, that's probably a good indication that you need to cut your hole just a little bit bigger.


Once I had all my dots drying I set to work cleaning up my little jars. I found that orange oil worked really well to get off that little bit off glue left behind once the label was peeled off and it also took off the date that had been stamped on the glass.

I also spray painted the lids white, but you can see in the picture that the dates that were stamped on the lids still showed through so I put white glitter on them as well. If you are like my Aunt Maria though and refuse to even have glitter in your house than I would suggest trying a darker color of spray paint. I didn't think black would look very nice for Valentines day though.


After the lids were all glittered, the only thing left to do was to add a few quick embellishments to the jars and they are ready to be taken to school.


For the red sprinkles I just did your basic add food coloring to sugar, except I used In The Raw Sugar since the crystals are larger.

Easy, cute, and very inexpensive!


Friday, January 20, 2012

Valentine's Day Blocks {Reversible!}

I am so excited about this. I finished a project that has been close to a year in the making! Remember THIS post from last year? I finally made the Valentine's Day side (and if I do say so myself it's way better than the St. Patrick's Day side....I might need to revamp a little!).

My blocks were already sanded and painted so I was able to get right to work. I started by cutting out some v-day scrapbook paper 3"x3" (slightly smaller than the blocks). And then I inked the edges with red ink to make them stand out a little more.


Next I modge podged each paper to the blocks and then used my Cricut to cut out the letters "I", "L", "O", and "U".


I had a little trouble decided what to do as my "heart" so I made a few different options. I ended up deciding the felt heart embroidered with pink embroidery floss worked the best. It stood out the most.


The final steps were simple. I used modge podge to glue on my letters and hot glue for the felt heart. When I was done I felt like it still wasn't quite finished so my final touch was to add a few gemstones.

And the opposite of this:


Is now this:


I am so happy with how they turned out. Now I just need to decide where to display them.


I know it's still a month away but I already got out my Valentine's Day wreath too. I remember growing up that my mom always had a little valentine for us on the table either in the morning or when we came home from school. And when I was a teenager my dad always put a flower on our (his daughters) beds. I'm excited to come up with something fun and creative to do for my girls and hubby this year. Do you have any special Valentine's Day traditions?

Linked up at i heart naptime

Wednesday, October 19, 2011

Laila's Flower

I recently made Laila this flower headband for her pictures and found that it was so easy and fun that I ended up making a whole bunch of flowers for my other girls as well. I got the original instructions on this flower from a friend, and then I tweaked it a little.

The first thing you need is a very messy workspace!  


Any pair of scissors will work, but I highly recommend a small pair of spring loaded scissors because it will save your hands.


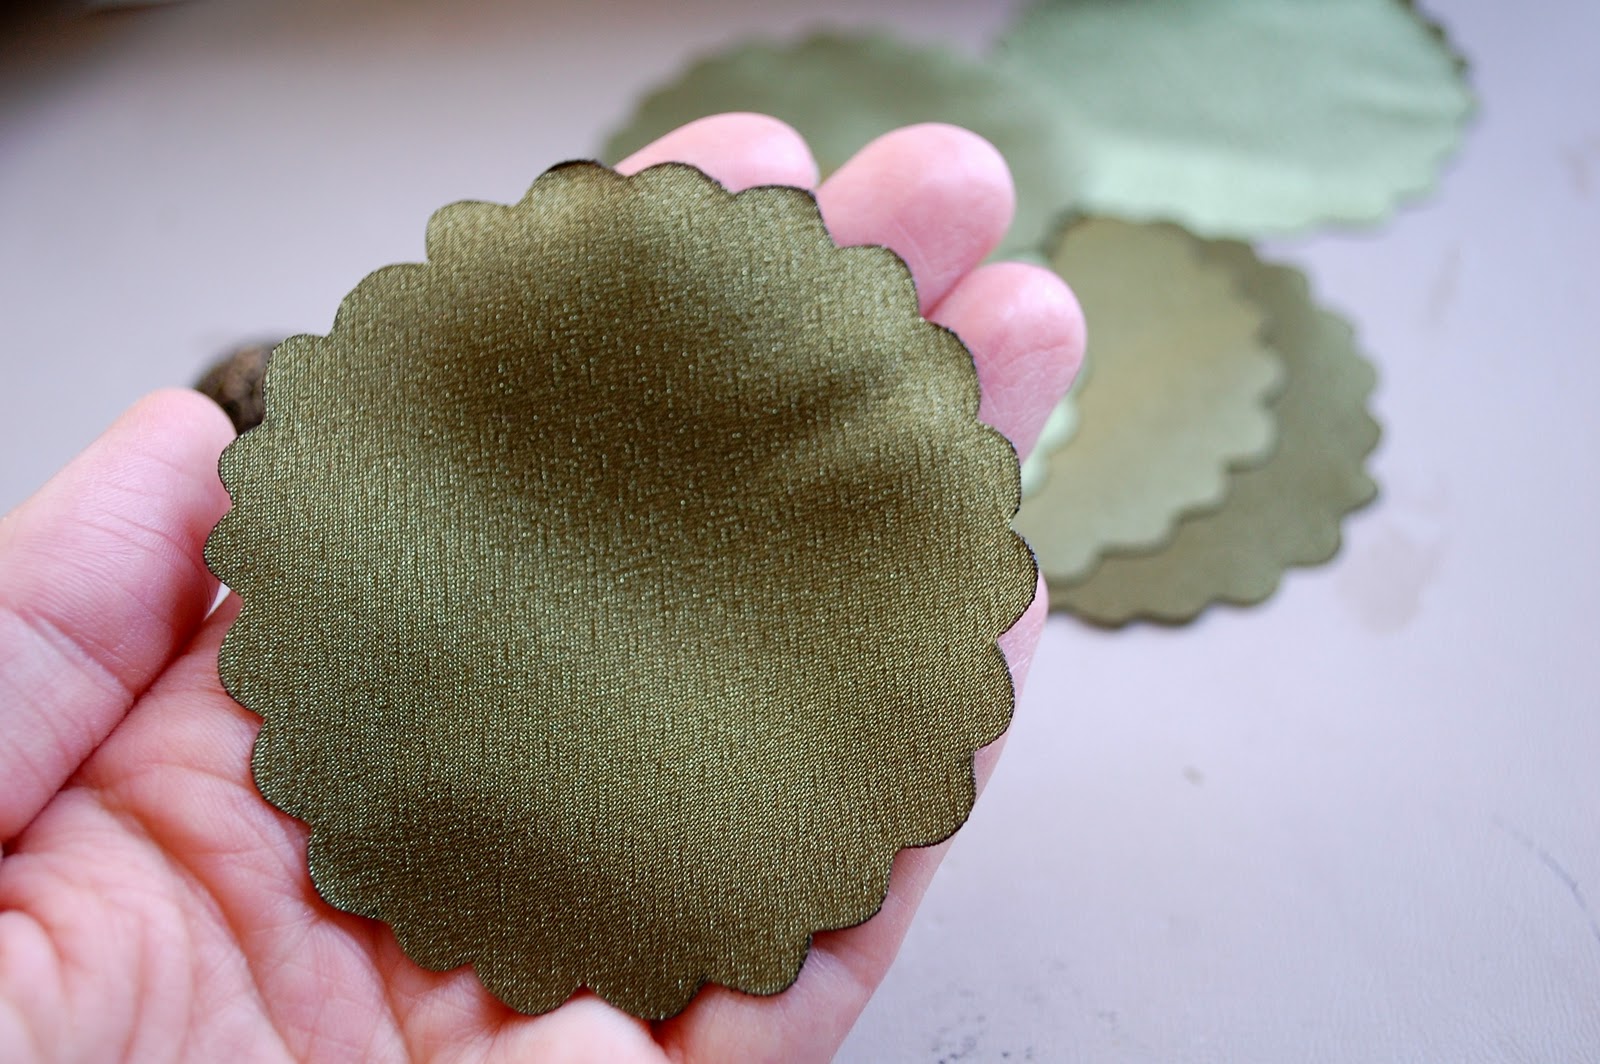
The pattern for this flower is just a scalloped circle. If you have a fancy cutting machine than you probably have a template for something like this, otherwise find a cup that you can trace and then hand draw the scalloped edges. You really do want to make sure that the circle is uniform though (I found that out the hard way) You will notice that some of my flowers have gaps inbetween each section.

For my older daughter I made flowers that were pretty big using this pattern.


For the younger two I made flowers that were just a little bit smaller using this pattern.


The first thing you need to do is trace and cut out 8 fabric circles. Then you need to use either a lighter or an embossing tool and melt the edges a little bit so they don't fray.


Fold each circle in half and then in half again so it looks like a piece of pie. You can either hand sew each wedge closed, or if you are lazy pressed for time like I am just put a small dab of hot glue down by the tip.


Then glue two of the wedges together, one on top of the other.


When you have all four wedges glued or sewn together, cut out a small circle of felt and glue down your first wedge with the tip in the center.


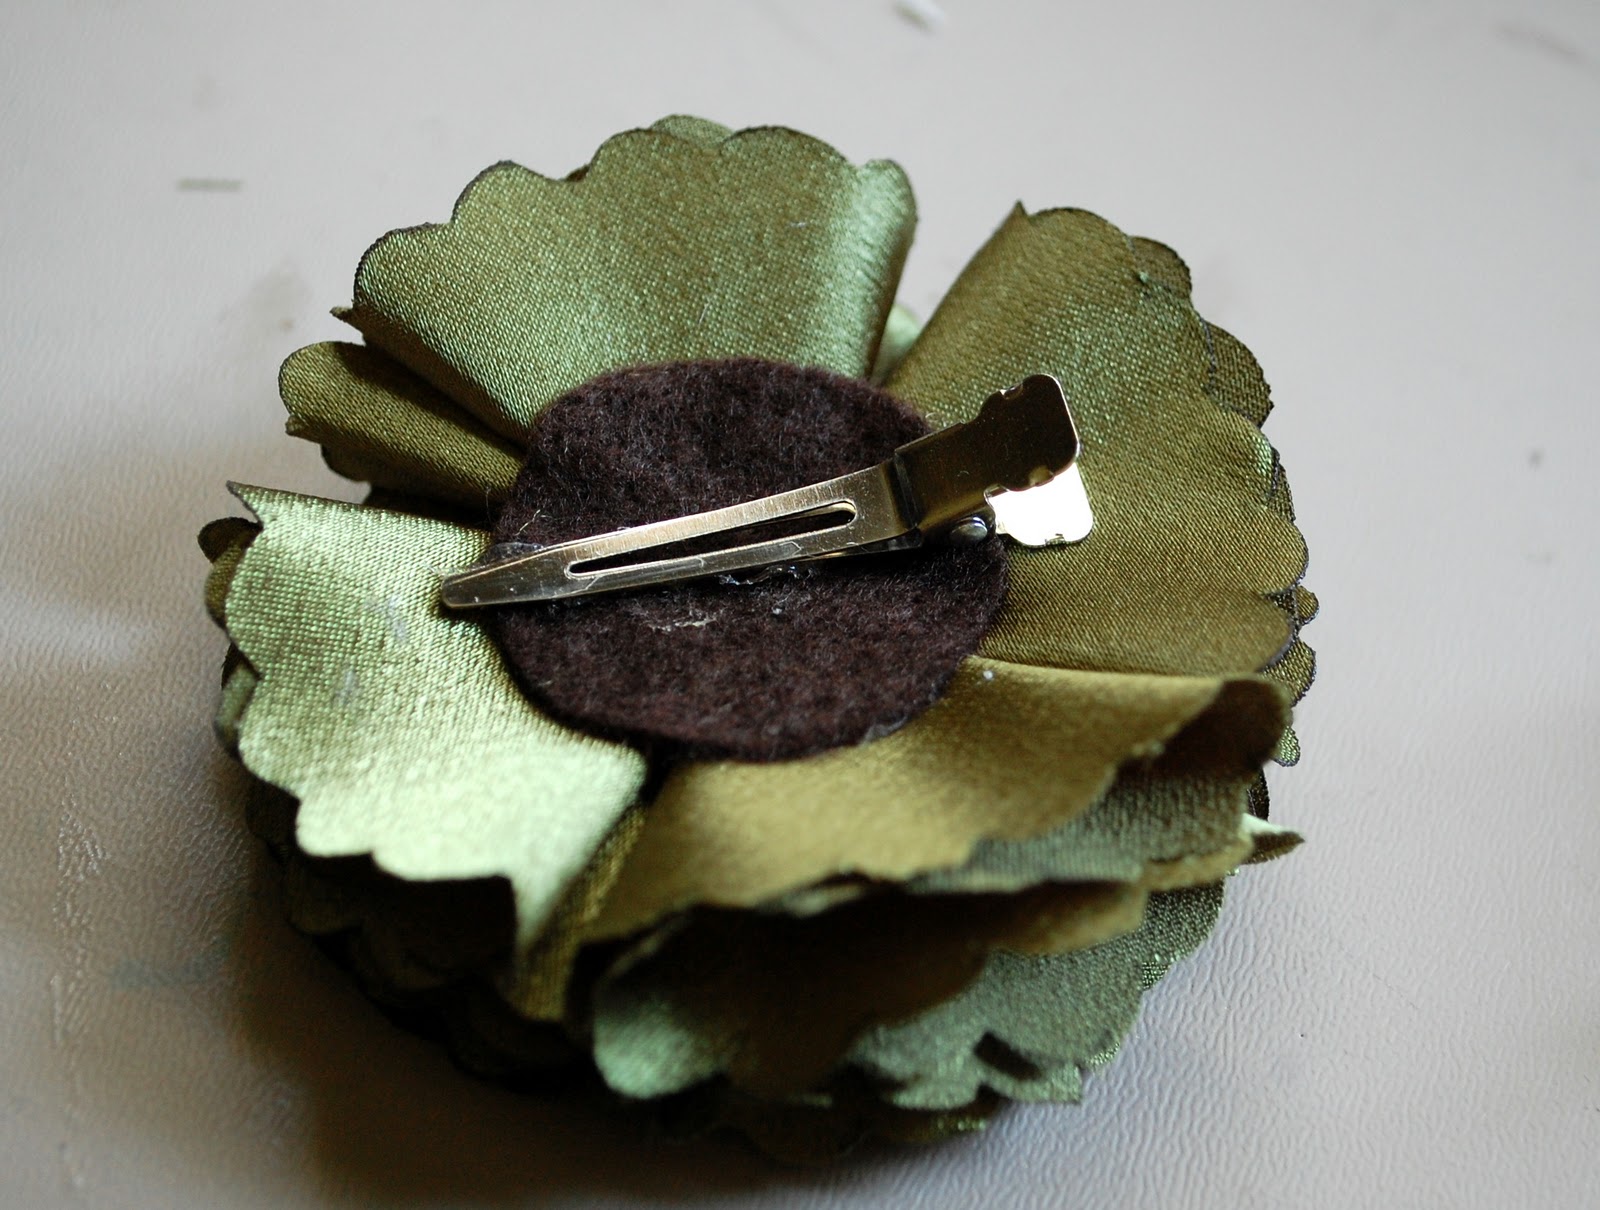
So I kind of stopped taking pictures for a few steps but they are easy so I'm sure you can figure it out. Glue down the next wedge right next to the first one and then continue around the circle until all four wedges are glued down in a circle. The last two steps are to glue some sort of button in the center on top and then flip it over and glue on a clip.


When I did Laila's flower for her pictures I also cut out a circle of tulle and also glued that to the bottom of the circle. Then I made this one for my daughter Samm that actually incorporated the tulle into each wedge. 


If you make one like this, don't cut out eight circles of fabric and then eight more of tulle. Just pin the fabric to the tulle and cut them out at the same time.


Place the tulle circle on top of the facbric circle.


Fold it up like normal and finish it off like I just explained.


You can clip these flowers into their hair or on a headband like I did for Laila, or you can do what my girls did and make a flower crown!


Also, the lighter weight the fabric is, the more the flower will fluff.


Saturday, September 10, 2011

Could I Get Any Cheaper

As much as I consider myself a girly girl, I've never been one to dress up my own girls in frills and bows. Last week though I decided that I'm going to live up every moment of my last baby girl so I took a deep breath and re-joined the world with a trip to the fabric store. The trip itself was fairly successful, despite the fact that I had completely forgotten how long it takes just to get out of the house with a baby and everything they need. (side note-I got brave and took all four kids out today on my own only to discover that I had no diapers!)

My objective for the fabric store was really simple. Make a cheap, easy headband.


I bought 12 1/2 inches of stretchy lace, and 1/8 of a yard of this blue flower trim (same isle as the lace) which actually gave me two flowers so I can make another one a little bit bigger when she outgrows this one. I sewed together the right sides of the lace, glued on one of the flowers and then as an after thought glued on a bead that I already had. I also cut a small circle of white felt to glue on the underneath side of the flower to cover up where I had sewn together the lace.

It took me less than ten minutes and the total cost was around $1.25!

Not bad for my first post baby craft!

Friday, July 1, 2011

Beads Mark The Spot {Tutorial}

I know I don't have to say it again but here it is. I love to read. And since reading holds a special place in my heart what better way to celebrate that than to show you all a tutorial on how to make my favorite bookmark.

Here's what you'll need:

waxed linen (found by the jewelry wire and cord)
1 charm
beads of various shapes, sizes, and colors
scissors

Start by measuring your book and adding about 4-5 inches. Times that amount by 4 and that is how long you need to cut your waxed linen.

 After you've cut your linen to the right size fold it in half. Take your charm and thread it on one side and slide it down to the center where your linen has been folded in half.
 Tie a knot just above your charm to hold it in place.
 Add a bead or two by threading through both pieces of linen at the same time. Tie a knot just above that to secure it.
 Next add two or three small beads, again threading through both pieces. These will be what adjust the size of your bookmark.
 Threading through both pieces still, add a variety of beads about 3 inches long. You can make it any way you want. Sometimes I make a pattern and sometimes I just add beads. (A Side note that I can't forget to mention is that your beads will need a big enough center to thread through both pieces of waxed linen and sometimes that can be difficult to find. Don't get discouraged. Those beads are out there!) Once you've got your beads on tie a knot at the very bottom to keep all of your beads from coming off.
 Done! See, wasn't that easy? And no fancy tools required. Now to put it on your book: Open your book to about half way. Take your book mark in your hand and separate the two pieces of linen in between your two small beads and your 3" length of beads. Put one side of your book where you've opened it up in between the two pieces of linen with the 3" beads being at the bottom of the book and your two small beads at the top. Slide the small beads down to the top of the book until your book is secured tightly in between the linen. You should have an extra length hanging down with a charm on it. This is your bookmark. (mine is hard to see but it's on the left side). Now your book mark is securely in place all the time and all your have to do is move the charm from page to page to mark your place.
 I love it because my bookmark never gets lost. Plus it looks pretty cute which is an added bonus.
 By the way, if you haven't read Charlie St. Cloud yet DO IT! It's a great book. And if you already saw the movie, read the book anyway. It's way better!
 I hope I was able to make that all make sense. How to put it on the bookmark is the hardest part. If anyone needs further explanation let me know. I'd be glad to give it another try.

Happy reading!

Friday, June 17, 2011

Fabric Flower In Reverse {Tutorial}

As you surely know by now Sally and I are both currently working on the never ending project of completing our girls' rooms. I finally finished my painting and have been working hard to try and decorate it. I am good at coming up with ideas but carrying them out is a bit of a challenge for me. My resources are limited living in a small town so it's a little slow going.

This week I've been working on the lampshade in the girl's room. You may remember in the not so distant past that I recently made a fabric covered lampshade for their room. Since that time their room has been redecorated and the lamp no longer worked in the room. So I stripped it of the old fabric and started in on a new project. My inspiration came from these lamps I saw on Pottery Barn Kids that cost $150!

 I knew I could make something similar for a lot cheaper. I wanted to make the flowers instead of buying them so I searched the web for a good flower tutorial and started working. I had no idea what I was getting myself into when I started. I still LOVE this flower but covering a lamp with them has taking many many hours, lots of fabric, and about 500 circles. Sheesh. My hands are sore.  And sadly it's a love/hate relationship because I discovered I love my lamp but hate it in the girls room. It's too dark. So I will most likely end up redoing it. But enough about that. Let's get on to the flower. It's very similar to the fabric flower tutorial I posted about a few months ago so if you've tried that one this one will be a breeze.

You will need:

fabric
thread
needle
scissors
hot glue
felt
something to trace your circles

Start by tracing your circles onto fabric. I used a cup for mine. You will need anywhere from 12-20 circles for one flower. Depending on how poofy you want it. I used 12 to save on fabric but I think they look better with 16-20. Personal preference.

Take one of your circles and fold it in half.

Fold in half again.

Now fold the sides down accordion style, one to the front and one to the back (see pictures).


Take a needle and thread and pierce the corner making sure you have pierced all layers on the fabric.

Repeat until you have all of your circles threaded.

Finish off by tying the two ends of your thread together tightly.

Turn your flower over and fluff them up a bit. I added a pearl to the middle of mine for a little extra something.

Glue some felt on the back and then you can easily add a hair clip, pin, or use it on any number of craft projects. Here's what I did with mine. Like I said.....love/hate relationship. By the time I do the final girls room reveal it will probably be different.

Related Posts Plugin for WordPress, Blogger...